Step by step guide to the successful incubation of quail eggs with tips to improve results.

It takes 18 days for quail eggs to hatch. The exact number of days can vary from 16 to 20 depending on the breed of quail and the temperature and humidity of the incubator.
Table of Contents
Quails eggs are very small but with careful handling and some basic equipment you will be able to incubate and hatch quail eggs successfully at home.
Selecting high-quality eggs is crucial for a successful incubation process. Choose eggs from healthy well fed parent stock that are free from cracks, deformities, or abnormalities. The fresher the eggs, the higher the chances of hatching healthy quails.
Quail egg incubation conditions.
Quail eggs require a temperature of 99.5°F or 37.5° C and a humidity of 40 to 50% for the first 14 days. The humidity should be increased to a minimum of 65% for hatching.
These conditions mimic the natural nesting environment and promote healthy embryo development.
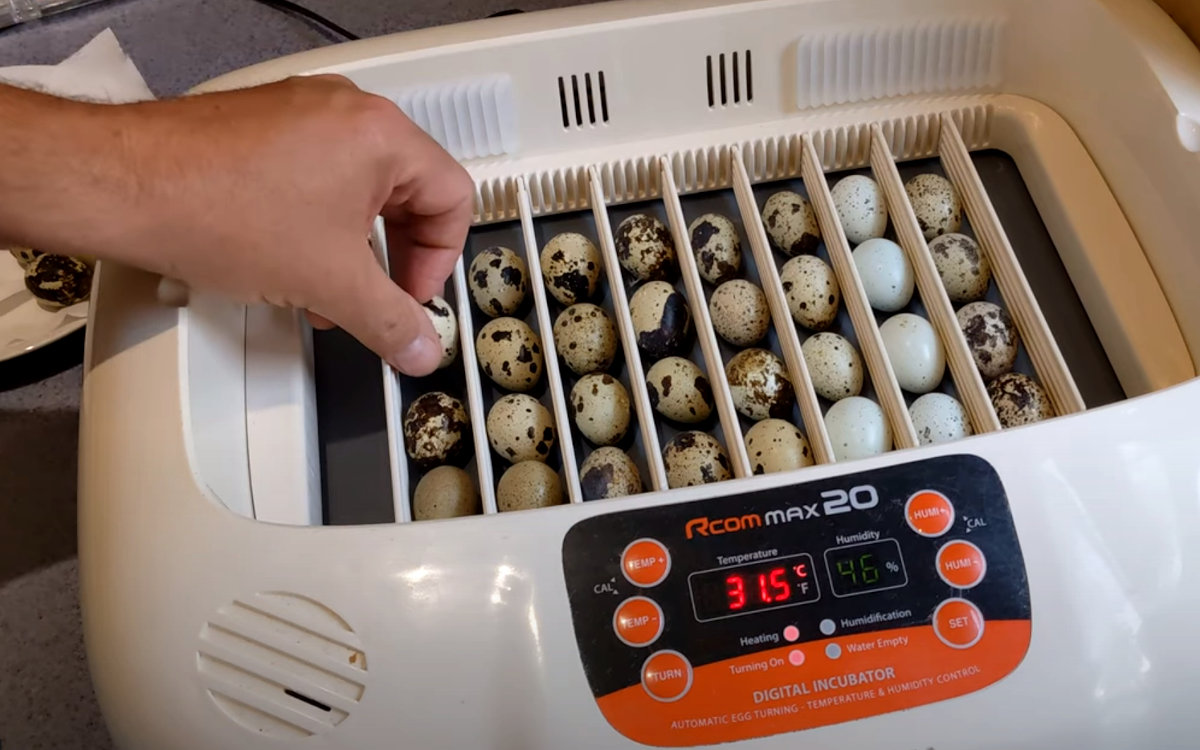
Below: Setting quail eggs in my Rcom incubator.
Stable temperature and humidity is more important than the actual value. If you can only raise your hatching humidity to 60% for example that will likely be better than if you keep messing with the incubator trying to get the humidity higher. The same is true for temperature, if your machine is holding 99.3, that is better than you constantly adjusting the setting and allowing the temperature to seesaw up and down.
The shells on quail eggs are very thin and need to be handled with great care. Putting cold eggs into a warm incubator can cause hairline cracks so give them time to come to room temperature naturally for a few hours before setting.
Below: The shell on quail eggs is just 0.2 mm thick and cracks very easily.

Quail eggs need to be turned multiple times a day to prevent the embryos from sticking to the inner shell membrane. Automatic incubators offer convenience by automatically rotating the eggs at regular intervals. If using a manual incubator, carefully turn the eggs by hand.
In my experience quail chicks often hatch very quickly and it is common for chicks to emerge within 60 to 90 minutes and the hatch to be complete within 24 hours.
What equipment do you need to hatch quail?
To produce healthy young quail you will need an incubator, a candling lamp, an accurate hygrometer and thermometer and some water for humidity.
Below: A video of me talking you through my setup for incubating quail eggs.
Using quality equipment will ensure the eggs have sufficient ventilation and are kept at the right temperature until they emerge.
Timeline of the development and hatching process of Quail eggs:
- Day 1-3: The embryo starts to develop.
- Day 4-7: The embryo grows rapidly.
- Day 8-14: The embryo starts to grow down feathers.
- Day 15: The humidity in the incubator is increased to help the chick hatch.
- Day 16-18: The chick hatches.
The first sign that a chick is about to hatch is when it starts to pip, or make a small hole in the eggshell. The chick will then continue to peck at the eggshell until it is free. The hatching process can take up to 24 hours.
Once the Quail chick has hatched, it will be wet and its feathers will be damp. It is important to let the chick dry off before handling it. You can help the chick dry off by placing it in a warm, draft-free area.
Below: The importance of accurate equipment when incubating quail eggs.
The chick will need to be fed and watered within a few hours of hatching. You can feed the chick a commercial quail starter crumble. You can also provide the chick with water in a shallow dish that has marbles or beads in to prevent drowning.
The chick will need to be kept warm until it is fully feathered. You can provide the chick with a heat lamp or a brooder box. The brooder box should be kept at a temperature of 95-98 degrees Fahrenheit.
The chick will be ready to leave the brooder box when it is fully feathered and about 3 or 4 weeks old.
Step by step guide on how to incubate quail eggs:
- Set up your incubator in advance and test. Make sure the temperature is set to 99.5 degrees Fahrenheit and the humidity is set to 45%. You may need to add a little water to the incubator to achieve this.
- Gather your eggs. Quail eggs can be incubated from day one, but it is best to wait until day three or four for the best results.
- Mark your eggs. Use a soft pencil to mark an X on one end of each egg and an O on the other end. This will help you track the development of the embryos.
- Set the eggs in the incubator. Place the eggs in the incubator with the marked side facing up.
- Turn the eggs. Quail eggs need to be turned every two hours for the first 14 days. After 14 days, you can stop turning the eggs.
- Increase the humidity. On day 15, increase the humidity in the incubator to 65-75%. This will help the chicks hatch.
- Monitor the eggs. Check the eggs every day to make sure the temperature and humidity are correct. You should also candle the eggs on days 6 and 12 to check for development.
- Remove any dead or infertile eggs. After you have candled on day 6, remove any eggs which are not developing.
- Hatching. Quail chicks will start to hatch on day 16 or 17. The hatching process can take up to 24 hours.
- Be patient and keep the incubator closed during the hatch. Opening the lid and disturbing a hatch in progress can cause the chicks to die in the shell.
- Care for the chicks. Once the chicks have hatched, they will need to be kept warm and dry. You will need provide them with a heat source like a lamp and a brooder box.
Additional tips for incubating quail eggs:
- Use a good quality incubator. A cheap incubator may not be able to maintain the proper temperature and humidity, which can lead to problems with hatching.
- Keep the incubator clean. A dirty incubator can harbour bacteria, which can harm the eggs.
- Monitor the eggs closely. The success of your hatching venture depends on closely monitoring the eggs and making sure the temperature and humidity are correct.
- Be patient. It takes time and patience to hatch quail eggs. Don't get discouraged if you don't have a 100% hatch rate.